St. Croix Report
Alex Klein of Oroville, California is a St. Croix Rod pro-staffer who comes from a strong fishing family. “I’ve been fishing since I was really young,” Klein says. “Bass Fishing Hall of Fame member, Gary Klein, is my uncle, and my dad, Steve, taught me how to fish. My dad was my fishing mentor, got me into the sport, and was also the one who encouraged me to start fishing professionally.” Klein has fished the Wild West Bass Trail since the circuit was formed in 2015.
 Alex Klein building his custom rod
While Klein has fished St. Croix rods ever since he began fishing competitively, he says he also enjoys building and fishing his own rods, which he crafts on Rod Geeks BASS 3 blanks. “It’s just something I really enjoy doing,” he says. “There’s a lot of custom builders out there making incredibly unique and beautiful rods. I do enjoy the creative side of it, but I get the most satisfaction from building practical rods that are customized and set up to support my style of fishing. I choose Rod Geeks blanks because they’re made by St. Croix’s people in St. Croix’s factories in Park Falls, Wisconsin and Fresnillo, Mexico.
Klein says you don’t need a lot of fancy equipment or tools to build a fishing rod. “For a practical build that fishes well and that you can be proud of, you just need a few basics,” he advises. “You need a jig that the rod can rotate in for thread wrapping, applying epoxy, and for drying. They come with a little electric motor that slowly spins the rod in the jig. You can buy one that’s pre-made or make one yourself if you are handy. You also need an Xacto knife for thread trimming, a drill and drill bits, some clamps for holding your handle cork pieces together while they’re drying, a small putty knife or similar object to remove excess glue and epoxy, and some kind of a sander to form and finish your cork handle. You can buy a wide variety of pre-made handles in many different materials, but they’re not as fun as making your own!”
After picking and obtaining a rod blank as the foundation for your build, Klein says there’s a short list of other basic materials and supplies you’ll need to complete a rod. “I prefer a Tennessee handle design on my spinning rods, which allows me to place a reel anywhere I want on the handle,” Klein says. “It also simplifies a build because you don’t need a reel seat, but in all other cases you’ll need to choose and buy a spinning or casting reel seat and there are a ton of them to choose from on the market. You need cork for your handle, a set of casting or spinning guides, wrapping thread, glue for your handle and reel seat, epoxy for your guides, and some thin masking tape. If you want to get fancy, there are also a variety of trim or accent pieces you can buy to give your rod a custom look while also fine-tuning balance, as well as things like decals that can be applied to the rod and epoxied over.”
Klein recommends buying guides in a pack. “We chose Fuji Torzite guides for these two rods,” he says. “If you buy them in a set, they’ll come with a spacing guide that tells you how to space them along the blank. We have so many rods that we usually just grab a comparable St. Croix rod to the one we are building and place our guides in the same locations. It’s a nice shortcut.”
Klein offers new builders a tip on thread selection. “We’re into function with our builds,” Klein says. “Of course, we want them to look great, but thread wrapping is a skill and small mistakes can happen even when making the most basic wraps. I like to use thread that closely matches the color of the blank because it tends to hide any slight imperfections in your work.”
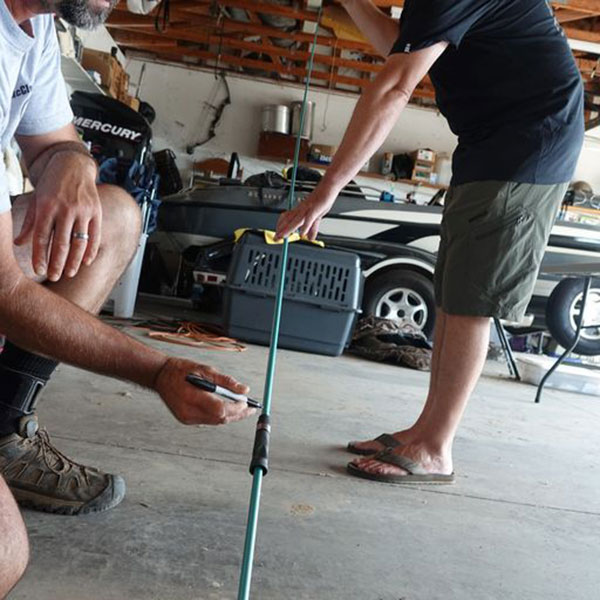
Once you’ve assembled all your materials and tools at your work bench, it’s almost time to start laying out your build. First, however, you need to find and mark the spine of the blank. “You find the spine of the rod by bending it and rolling it. A quality blank will have a perfect spine… soft and hard sides opposed 180 degrees,” Klein says. “Put a small flag of tape around the blank to give yourself a visual reference for orientation. Put the butt of the blank on the ground or table, pinch the rod with one hand near the middle and the other hand loosely near the tip and bend the blank in your hands while slowly rotating it with your pinched hand in the middle. You’ll feel a quick jump as you turn the rod and it kind of snaps into place. You’ll also see it on your flag of tape. Make sure to rotate the blank all the way around, because there may be a jump on both sides. The more dramatic one is the hard spine or side of the rod, which naturally pops to the top when completing this exercise. You want the hard spine on top for your build so you need to align your guides and your reel seat to that spine. For a casting rod where the guides will be on top, take a china marker and draw a four or five-inch line along the hard-spine side of the blank. This will be your reference point for aligning your guides and reel seat. For spinning rods where the guides are placed on the bottom of the blank, make your mark along the soft-spine side of the rod.”
 Rod Building
After properly marking the spine of the rod it’s time to start laying out the lower part of the rod.
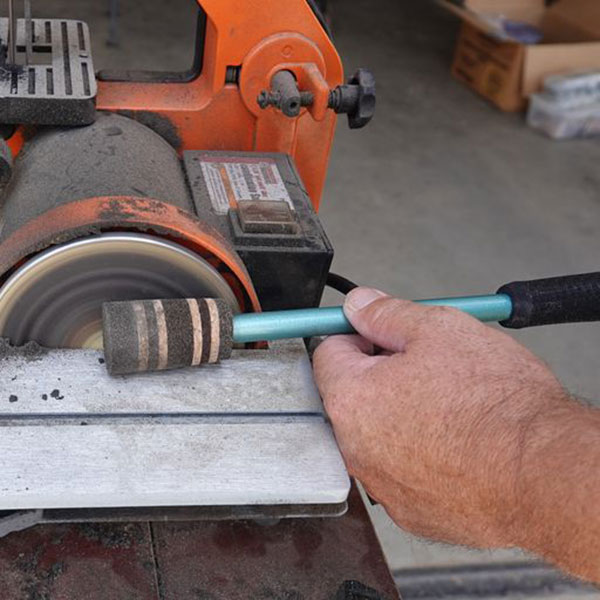
“Get everything marked exactly where you want it on the butt section of the blank… your cork handle pieces and your reel seat if you have one,” Klein advises. “Select a drill bit that’s the same diameter as the butt end of the blank and use it to drill out the middle of your cork pieces with a regular drill. Slide the cork pieces and your reel seat onto the butt of the blank and make sure everything is where you want it. You can use a finished rod for reference if you want. Also make sure your reel seat is properly aligned to your spine mark. Glue the cork pieces and reel seat in place and clamp everything together until it dries. After everything is dry, form your cork handle by carefully sanding everything until it’s just right. A lathe is helpful here if you have one.”
After your handle is installed, formed, and sanded, it’s time to lay out and mark your guides. Klein says you can use a finished rod as a guide or follow the recommended spacing information that came with your guide kit. “Once you have the location of each guide marked and aligned with the spine, start affixing each guide with blue painter’s tape or a small piece of surgical tubing,” he says. “When you’re happy with the placement and alignment, you are ready to start wrapping, securing each guide in place with thread.” Klein says the trick is paying attention to detail. “It’s very simple, just go slowly. Start your wrap, then cross over the loose end to capture the wrap. Then work slowly stacking thread over the foot of the guide. You can use an Xacto knife to cut and remove the surgical tubing or masking tape once you have enough turns to hold the guide in place. If you’ve never finished a wrap before, watch some YouTube videos ahead of time for additional tips and so you’ll know how to finish each wrap cleanly with a special knot.”
 Building custom rods
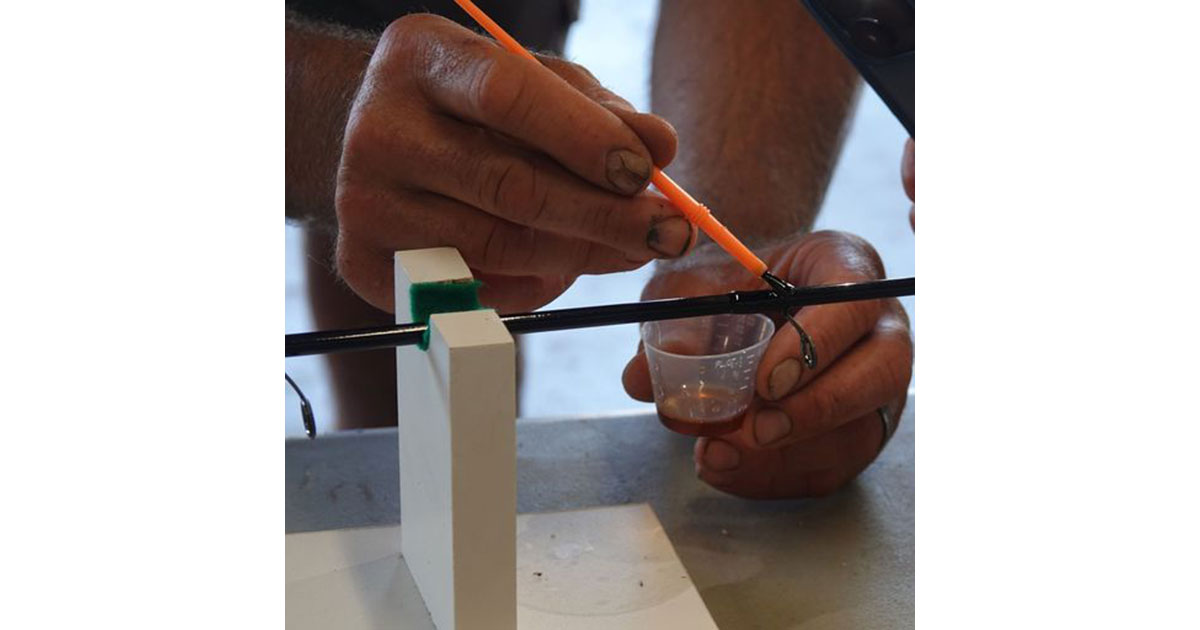
After all guides are wrapped with thread and you’ve glued on your tiptop, it’s time to mix up your epoxy and get the rod rotating in the jig. “Just dab a bit of epoxy over the threads,” Klein says. “Go slowly and sparingly. The threads will soak it up but you don’t want to use too much. You’ll see some excess start collecting around guides and you’ll know you have enough on there. Remove the excess epoxy with a letter opener or thin putty knife and have some paper towels ready to wipe it on. Once they are all epoxied, let the completed rod spin and dry overnight and you’ll be ready to use your new rod in the morning!”
Klein says he enjoys building bass rods not solely as a creative outlet, but because he knows everything is laid out and done exactly how he wants it. “It is fun, and your skills will improve with each build,” he says. “If you’ve ever thought you may want to try building a rod or two, I’d definitely encourage you to do it,” he adds. “Just start with the best blank you can afford. And it also helps to seek out some guidance in advance from some experienced builders. If you don’t have experienced friends like Johnny and Ryan, there’s tons of great content online – YouTube, specifically – that will help shorten the learning curve and add quality to your project before you even start.”


